Airborne Stadium Encoder Installation Guide
1. Unboxing and Setup
Unbox the Airborne Stadium Encoder.
Ensure the unit is ready for connection to your network and cameras.
2. Network Connection
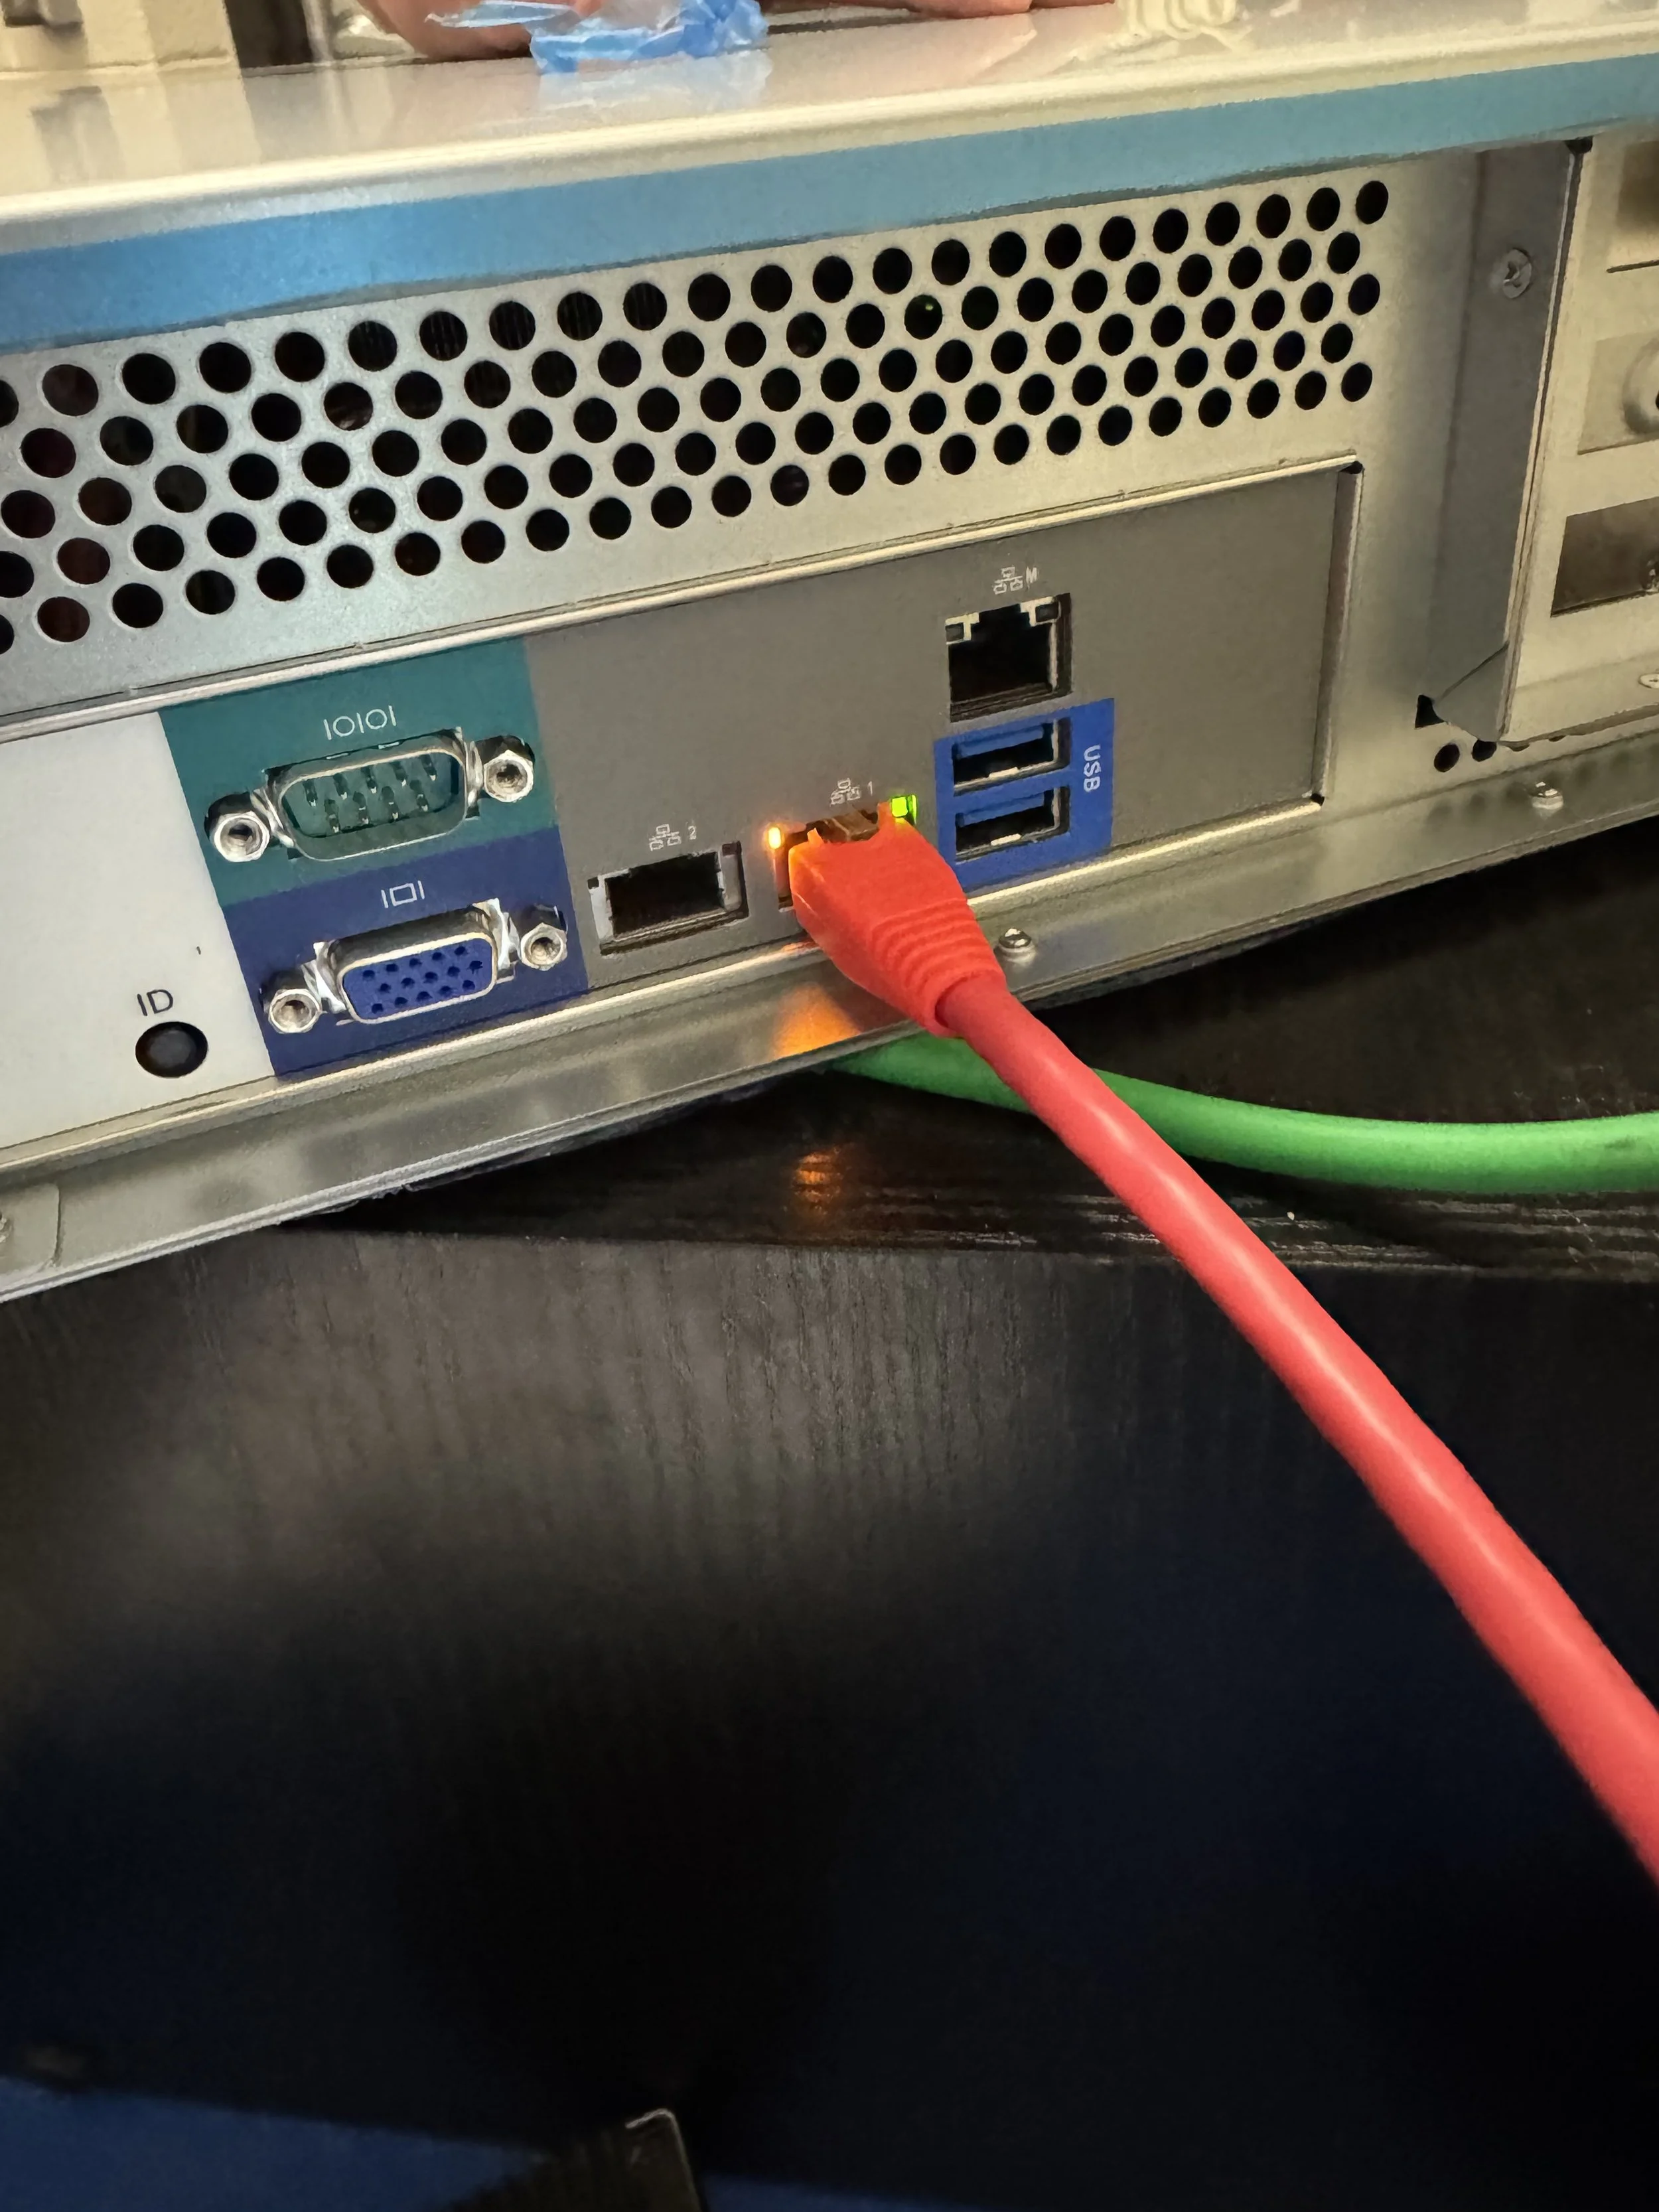
Plug the Ethernet cable into the network port located to the left side of the USB ports (do not use the port located above).
Use the provided MAC address to configure a DHCP reservation or static IP on your network.
Once the encoder is on the network, notify ScoreBreak Support and provide the assigned IP address.
A ScoreBreak technical representative will register your Stadium Encoder to your team account.
3. Camera Connections
Cameras can be connected to the encoder in either of the following ways:
Direct (Wired): Attach cameras via SDI connection.
Network (IP): Register RTSP video feeds over the network.
Network camera feeds can be registered in the ScoreBreak app when the Stadium Encoder is online, or your ScoreBreak technical representative can add them for you.
4. System Verification
Check the ScoreBreak app to confirm the encoder is visible and online.
ScoreBreak may verify connectivity using RustDesk for remote diagnostics.
Troubleshooting
If the encoder does not appear online or perform as expected:
Connect a monitor, keyboard, and mouse to the unit.
Use the VGA port for the monitor connection.
Confirm the system boots fully into Ubuntu.
Once Ubuntu loads, verify that the monitor display turns off automatically (this is expected behavior).
Network Access & Firewall Requirements
The encoder must be reachable via Ping or SSH from your wireless or campus network.
If you are unable to reach it, your firewall may be blocking required ports.
A complete list of necessary ports and protocols is available upon request from ScoreBreak Support.